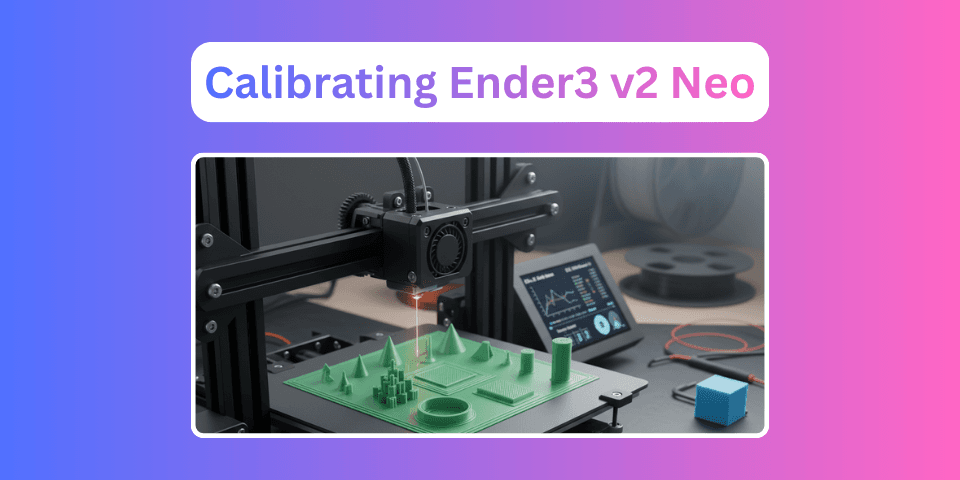
Ender 3 V2 Neo Calibrations That Actually Matter
Skip the fluff - these are the calibrations that actually improved my print quality on the Ender 3 V2 Neo after 2 years of use.
Why Calibration Matters More on a Budget Printer
Previously in Part 1, we got the printer assembled and running. You've printed your first Benchy, maybe a few keychains. Things are working... sort of.
But here's the thing: a stock Ender 3 V2 Neo out of the box is maybe 80% dialed in. That remaining 20% is the difference between "it works" and "this is actually good." On a Bambu Lab, the firmware handles most of this automatically. On the Ender 3, you are the firmware. The calibrations in this post are ordered by impact. Do them top to bottom, and your prints will improve dramatically.
1. Bed Leveling: The Foundation of Everything
I know, I covered this briefly in Part 1. But it deserves a deeper look because 90% of first-layer failures are leveling problems. The CR Touch auto bed leveling probe on the Neo is great, but it has limitation. It compensates for surface irregularities (warped bed, slight tilts). Also, it does NOT set the correct Z-offset (nozzle-to-bed distance). CR touch only measures a mesh, not the entire surface.
My Leveling Strategy
After 2 years, here's the routine I follow every ~10 prints:
Step 1: Manual tramming (the 4-knob method)
- Preheat the bed to 60°C and nozzle to 200°C
- Home all axes
- Disable steppers (so you can move the head by hand)
- Move the nozzle to each corner
- Slide a sheet of paper under the nozzle - adjust the bed knobs until there's slight friction
- Repeat corners twice (adjusting one corner affects the others)
Step 2: Run CR Touch probe
- Go to Leveling -> Auto Leveling on the printer menu
- Let it probe 16 points (4×4 grid)
- Save the mesh
Step 3: Z-offset fine tuning This is the most critical part. The Z-offset determines how close the nozzle sits to the bed during the first layer.
- Start a test print (a single-layer square works best)
- While printing, use Tune -> Z-Offset to adjust in real-time
- Too high: Filament doesn't stick, lines look rounded
- Too low: Filament squishes flat, nozzle scrapes the bed
- Just right: Lines are slightly squished, no gaps between them
[!TIP] Save your Z-offset after finding the sweet spot. On the Neo, go to Control -> Store Settings. Otherwise, it resets on power cycle.
2. Connecting Your Printer to a PC
Many calibrations in this guide require sending G-code commands directly to the printer. You can't do this from the printer's own screen - you need a USB connection and a host application.
What You Need
- Micro-USB to USB-A cable (comes with the printer)
- CH340 drivers - The Ender 3 V2 Neo uses a CH340 USB-to-serial chip. Windows 10/11 usually installs drivers automatically. If not, download from the manufacturer's site
- A host application - Pronterface (recommended), OctoPrint, or Cura's built-in monitor
Setting Up Pronterface (Printrun)
Printrun is an open-source 3D printer host software suite. The component we care about is Pronterface - a GUI application that lets you connect to the printer, send G-code, monitor temperatures, and even start prints directly.
Option 1: Pre-compiled binary (Windows/macOS)
- Download the latest binary from the Printrun releases page
- Extract the zip file
- Run
pronterface.exe - Windows Defender may flag it as unrecognized - click More Info -> Run Anyway
Option 2: pip install (Windows/Linux/macOS)
1pip install PrintrunOn Linux, you can also install from your package manager:
1# Ubuntu / Debian / Raspberry Pi OS
2sudo apt install printrun
[⚠️Warning!] Windows pip install Issue: After
pip install Printrun, runningpronterfacefrom the terminal won't work - the command isn't added to PATH. Instead, launch it using the script in Python's Scripts directory:
bash1python %CONDA_PREFIX%\Scripts\pronterface.pyOr if you're not using Conda, find the Scripts folder with:
bash1python -c "import sys; print(sys.prefix + '\\Scripts\\pronterface.py')"The pre-compiled binary (Option 1) avoids this entirely.
Connecting to the Printer
- Plug the USB cable into the printer and your PC
- Open Pronterface
- Select the COM port from the dropdown (usually
COM3or similar on Windows,/dev/ttyUSB0on Linux, check device manager for the correct COM port) - Set baud rate to 115200
- Click Connect
You should see the temperature readings appear in the bottom panel. You're connected!
Sending G-code Commands
The command box at the bottom of Pronterface is your direct line to the printer:
| Command | What It Does |
|---|---|
M503 | Show current firmware settings |
M92 | Show/set steps per mm (E-steps) |
M301 | Set hotend PID values |
M303 | Run PID auto-tune |
M500 | Save settings to EEPROM |
M501 | Load settings from EEPROM |
G28 | Home all axes |
Type a command, press Enter, and watch the response in the log. This is how we'll run the calibrations below.
[!TIP] You can also use OctoPrint (if you have a Raspberry Pi) or Cura's built-in monitor (Print -> Monitor) for sending commands. Pronterface is the lightest dedicated option.
3. E-Steps Calibration (Extruder Steps)
This is the single most impactful calibration you can do. E-steps tell the extruder motor how many steps to rotate to push exactly the right amount of filament.
Why It Matters
If your E-steps are off by even 5%, every print suffers:
- Under-extrusion: Gaps between lines, weak layers, visible infill
- Over-extrusion: Blobs, elephant's foot, rough surfaces
How to Calibrate
What you need: A ruler or calipers, a marker
Step 1: Check current E-steps
Send this G-code command via a terminal (Pronterface, OctoPrint, or even through Cura's built-in monitor):
1M503Look for the line starting with M92. The E value is your current E-steps. Stock is usually around 93 for the Neo.
Step 2: Mark the filament
- Load filament normally
- Measure 120mm from where the filament enters the extruder and mark it with a marker
Step 3: Extrude 100mm
1; Heat nozzle first
2M104 S200
3; Wait for temperature
4M109 S200
5; Set extruder to relative mode
6M83
7; Extrude 100mm slowly
8G1 E100 F100
Step 4: Measure what's left
After extrusion, measure from the mark to the extruder entry. If you marked at 120mm and extruded 100mm, you should have 20mm remaining.
- If you have 25mm remaining -> only 95mm was extruded (under-extrusion)
- If you have 15mm remaining -> 105mm was extruded (over-extrusion)
Step 5: Calculate new E-steps
1New E-steps = Current E-steps × (100 / Actual mm extruded)Example: If current E-steps = 93 and you actually extruded 95mm:
1New E-steps = 93 × (100 / 95) = 97.89Step 6: Set and save
1; Set new E-steps
2M92 E97.89
3; Save to EEPROM
4M500
Step 7: Verify - repeat steps 2-4 to confirm the new value gives you exactly 100mm.
[!IMPORTANT] Do this calibration once and it's done unless you change the extruder hardware. It's the motor's step accuracy, not a filament-specific setting.
4. Flow Rate (Extrusion Multiplier)
E-steps ensure the motor pushes the right amount of filament mechanically. Flow rate fine-tunes the actual extrusion for each filament, accounting for:
- Filament diameter variations
- Material melt characteristics
- Nozzle wear
How to Calibrate
Step 1: Print a single-wall cube
Print a hollow cube with:
- 1 wall / 1 perimeter
- 0 top layers
- 0 bottom layers (or just 1 for adhesion)
- 0% infill
- 0.4mm line width (matching your nozzle)
Step 2: Measure the wall thickness
Using calipers, measure the wall thickness at several points.
- Target: 0.4mm (your nozzle diameter)
- Reality: Will likely be slightly off
Step 3: Calculate the new flow rate
1New Flow Rate = (Expected width / Measured width) × Current Flow RateExample: If walls measure 0.44mm with flow rate at 100%:
1New Flow Rate = (0.4 / 0.44) × 100 = 90.9%Set this in your slicer's flow/extrusion multiplier setting. This is filament-specific - you'll want different values for PLA vs PETG vs TPU.
5. PID Tuning: Stable Temperatures
PID (Proportional-Integral-Derivative) tuning tells the printer how to maintain a stable temperature. Without it, you'll see temperature oscillations of ±5°C or more, which causes:
- Inconsistent extrusion
- Stringing on one layer, under-extrusion on the next
- Layer banding (visible lines in the print)
Hotend PID Tuning
Run this G-code (targets 200°C, runs 10 cycles):
1M303 E0 S200 C10The printer will heat and cool the hotend repeatedly. When done, it outputs three values: Kp, Ki, and Kd.
Apply them:
1M301 P<Kp> I<Ki> D<Kd>
2M500
Bed PID Tuning
Same concept, different command (targets 60°C):
1M303 E-1 S60 C10Apply:
1M304 P<Kp> I<Ki> D<Kd>
2M500
[!NOTE] Temperature fluctuations on the Ender 3 V2 Neo are modest out of the box (±2-3°C), but PID tuning tightens them to ±0.5°C. You'll notice the difference on long prints where consistency over hours matters.
6. Belt Tension
Belts stretch over time, and on the Ender 3, there's no automatic tensioning. Loose belts cause:
- Ringing/ghosting: Echoes of sharp edges in the print
- Dimensional inaccuracy: Circles become ovals
- Layer shifts: In extreme cases, the whole print shifts mid-way
How to Check
-
The pinch test: Pinch the belt together mid-span. You should be able to bring the two sides close but not touching. If they touch easily, it's too loose. If you can barely pinch them, it's too tight.
-
The twang test: Pluck the belt like a guitar string. It should produce a low hum, not a high pitch or a dull thud.
How to Tighten
Both the X-axis and Y-axis have tensioner knobs on the Ender 3 V2 Neo:
- X-axis: Tensioner is on the right side of the gantry
- Y-axis: Tensioner is at the front of the bed
Turn the knob clockwise to tighten. Small adjustments - quarter turns at a time.
7. Retraction Settings
Retraction is how the printer pulls filament back to prevent oozing during travel moves. On a Bowden setup like the Neo, this is especially important because the long PTFE tube between extruder and hotend creates a delay.
Key Settings
| Setting | Starting Value | Notes |
|---|---|---|
| Retraction Distance | 6mm | Bowden needs more than direct drive |
| Retraction Speed | 40mm/s | Too fast -> grinding. Too slow -> oozing |
| Z-Hop | 0.2mm | Lifts nozzle during travel to avoid hitting print |
| Combing | Within Infill | Avoids retractions by keeping travel inside the print |
Tuning Retraction
Print a retraction tower test - most slicers can generate these. Vary retraction distance from 3mm to 8mm in 1mm increments and see which level has the least stringing.
My findings after 2 years:
| Filament | Retraction Distance | Retraction Speed |
|---|---|---|
| PLA | 6mm | 45mm/s |
| PETG | 5mm | 35mm/s |
| TPU | 3-4mm | 25mm/s |
[!WARNING] Over-retraction is worse than under-retraction. Too much retraction causes clogs by pulling molten filament too far back into the cold zone. If you're getting random clogs, reduce retraction distance.
8. Temperature Towers
Every filament brand (and even different colors from the same brand) has a slightly different optimal temperature. A temperature tower prints a test structure where each section is printed at a different temperature.
How to Run One
Option 1: Built-in slicer tools
- OrcaSlicer and PrusaSlicer have built-in temperature tower generators
- Cura requires a plugin or manual G-code insertion
Option 2: Download a pre-made STL
- Search "temperature tower" on Printables
- Add temperature change commands at each section height
Reading the Results
At each temperature, look for:
| Issue | Means Temperature Is |
|---|---|
| Stringing | Too high |
| Poor layer adhesion | Too low |
| Rough/blobby surface | Too high |
| Clean bridging | Just right |
| Shiny, smooth walls | Optimal zone |
Find the temperature that gives you the best balance across all factors. Usually it's somewhere in the middle of the manufacturer's recommended range.
The Calibration Order Matters
Here's the sequence I recommend. Each step builds on the previous:
11. Bed Leveling         -> Foundation for everything
2     ↓
32. Connect to PC        -> Set up Pronterface for G-code
4     ↓
53. E-Steps              -> Mechanical accuracy
6     ↓
74. Flow Rate            -> Fine-tune extrusion per filament
8     ↓
95. PID Tuning           -> Temperature stability
10     ↓
116. Belt Tension         -> Periodically check
12     ↓
137. Retraction           -> Eliminate stringing
14     ↓
158. Temperature Tower    -> Optimal temp per filament
Steps 1-3 are one-time (until you change hardware). Steps 4-8 should be repeated or checked periodically - especially steps 4 and 8 for each new filament. Step 6 is periodic maintenance.
What I Wish I Knew on Day 1
After 2 years, here are the lessons I learned the hard way:
-
Do E-steps first, not last. I chased slicer settings for weeks before realizing my extruder was under-extruding by 7%.
-
Temperature matters more than speed. I kept trying to speed up prints when the real issue was inconsistent hotend temperature.
-
The bed isn't flat - and that's okay. The CR Touch compensates, but understanding that your glass/PEI bed has high and low spots helps you troubleshoot.
-
Write down your values. I keep a note with my E-steps, PID values, and per-filament settings. When firmware updates reset everything, you'll thank yourself.
-
Calibrate when things change. New filament? Temperature tower. New nozzle? E-steps. Moved the printer? Bed level. Don't re-calibrate for no reason, but don't ignore changes either.
What's Next?
In Part 3, we'll dive into the slicer deep dive - understanding how slicer profiles work, creating reliable profiles for multi-day prints, and handling the things that go wrong when you're 48 hours into a print.
Series Navigation:
- Getting Started with the Ender 3 V2 Neo
- Calibrations That Actually Matter (You are here)
- Slicer Deep Dive & Long Print Survival
- AI Print Failure Detection — Training YOLOv26
- Real-Time Print Monitoring & Automated Control
Previous Post
Getting Started with the Creality Ender 3 V2 Neo: A Complete Beginner's Guide
Next Post
Slicer Settings Deep Dive & Surviving Multi-Day Prints on the Ender 3 V2 Neo
If the article helped you in some way, consider giving it a like. This will mean a lot to me. You can download the code related to the post using the download button below.
If you see any bug, have a question for me, or would like to provide feedback, please drop a comment below.