ESP32-CAM Smart Doorbell with Instant Telegram Photos (Part 1)
A clean, single-board ESP32-CAM motion-triggered camera that instantly sends a photo to your Telegram when someone is at the door. No extra Arduino, no Gmail, no outdated hacks.
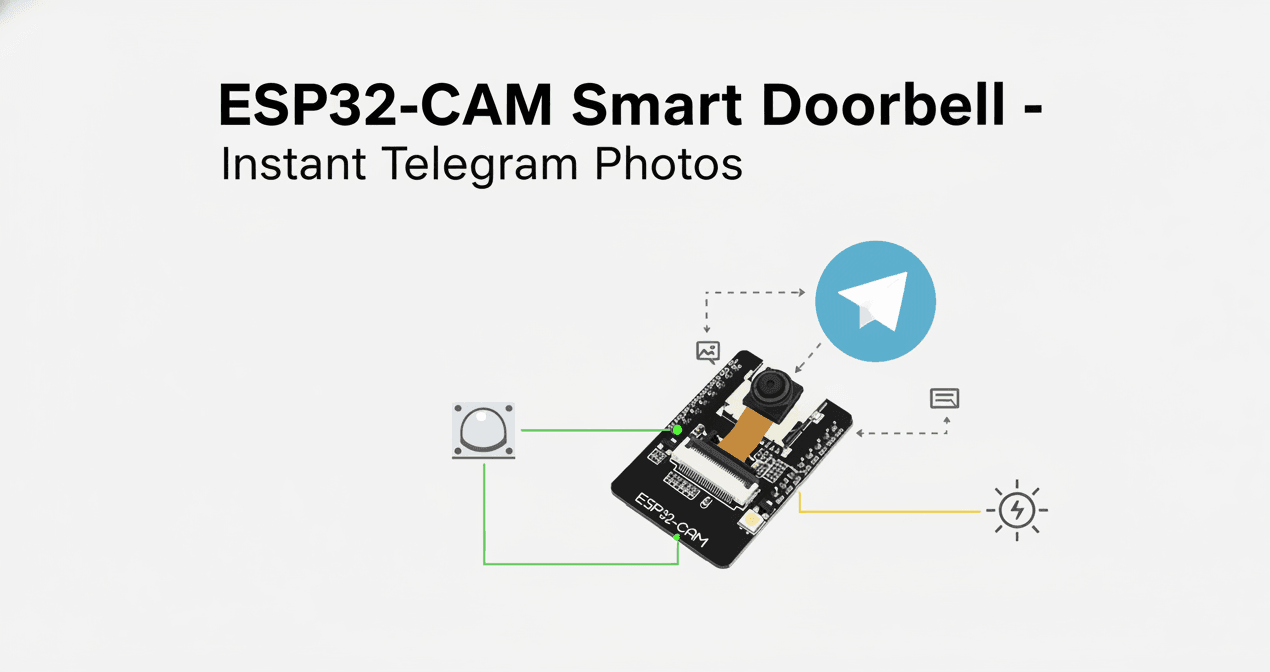
ESP32-CAM Smart Doorbell - Instant Telegram Photos (2025 Edition - Part 1/3)
Three years ago I built a huge two-board monster with an Arduino Uno just to read a PIR and an LDR.
It worked… but it was ugly, power-hungry and used methods that are completely dead in 2025.
This is the 2025 rewrite:
- Single ESP32-CAM (AI-Thinker)
- PIR + simple LDR directly on ESP32 GPIOs
- Photo sent to Telegram in < 3 seconds
- Flash LED control via Telegram
- Manual photo request anytime
- Clean, short code (< 400 lines)
- WiFiManager - no hard-coded credentials
- Proper brown-out disabled + watchdog
Perfect beginner-to-intermediate weekend project for under $15.
What you’ll have at the end of Part 1
- Motion at the door → ESP32-CAM wakes up → takes photo → sends it to your private Telegram bot
- Telegram commands:
/photo,/flashon,/flashoff,/status
Parts 2 & 3 (coming next) will add auto-light, door-open bell, SD-card backup, OTA, battery backup, etc.
Parts List (total ≈ $12-15)
| Qty | Item | Approx. price |
|---|---|---|
| 1 | ESP32-CAM (AI-Thinker) | $6-8 |
| 1 | PIR sensor (HC-SR501) | $1 |
| 1 | LDR + 10 kΩ resistor | <$1 |
| 1 | FTDI programmer or USB-TTL | $2-4 |
| Jumper wires, 5 V / 2 A PSU | you probably have |
Wiring (super simple)
1ESP32-CAM          PIR (HC-SR501)        LDR
2---------          --------------        ---
3GPIO 13    ────── OUT
4GPIO 14    ────── VCC (or 3.3 V - works fine)
5GPIO 4     ────── Flash LED (built-in)
6GND        ────── GND
73.3 V      ────── (optional for PIR)
8
9LDR:
10One leg → 3.3 V
11Other leg → GPIO 34 (ADC1_CH6) + 10 kΩ pull-down to GND
Step 1 - Create a Telegram Bot
- Open Telegram → talk to @BotFather
- /newbot → give it a name
- Copy the Bot Token
- Send /start to your new bot
- Go to https://api.telegram.org/bot<YOUR_TOKEN>/getUpdates → copy the number under "chat":{"id":XXXXXXXXX}→ that’s your chat ID
Step 2 - Arduino IDE Setup
- Install ESP32 board package (≥ 2.0.17 recommended)
- Libraries → Manage Libraries → install:
- UniversalTelegramBot by Brian Lough
- WiFiManager by tzapu
- ArduinoJson (v6)
ESP32-CAM Smart Doorbell Code Walkthrough
You can download the full code using the download button to your right (or just below the blog post). Let's break down how this code works step by step to understand what makes this doorbell tick.
Pre-Processor Directives
The code starts with essential includes and hardware definitions. We're using the AI-Thinker ESP32-CAM model, which has a specific pin configuration that differs from other ESP32-CAM variants. The camera pins (Y2-Y9, VSYNC, HREF, etc.) are hardcoded for this model - change these if you're using a different board.
For our peripherals, we connect the PIR sensor to GPIO 13 for motion detection, the LDR (light sensor) to GPIO 34 (an ADC-capable pin), and use GPIO 4 for the built-in flash LED. The Telegram credentials (BOT_TOKEN and CHAT_ID) are initially empty strings - WiFiManager will populate these during first boot.
The TRIGGER_INTERVAL is set to 10 seconds, meaning the doorbell won't spam you with photos if someone lingers at the door. This prevents notification fatigue while still catching everyone who approaches.
1#include <WiFi.h>
2#include <WiFiClientSecure.h>
3#include <UniversalTelegramBot.h>
4#include <ArduinoJson.h>
5#include <WiFiManager.h>
6#include "esp_camera.h"
7
8// Camera model: AI-Thinker
9#define PWDN_GPIO_NUM     32
10#define RESET_GPIO_NUM    -1
11#define XCLK_GPIO_NUM      0
12#define SIOD_GPIO_NUM     26
13#define SIOC_GPIO_NUM     27
14#define Y9_GPIO_NUM       35
15#define Y8_GPIO_NUM       34
16#define Y7_GPIO_NUM       39
17#define Y6_GPIO_NUM       36
18#define Y5_GPIO_NUM       21
19#define Y4_GPIO_NUM       19
20#define Y3_GPIO_NUM       18
21#define Y2_GPIO_NUM        5
22#define VSYNC_GPIO_NUM    25
23#define HREF_GPIO_NUM     23
24#define PCLK_GPIO_NUM     22
25
26// Pins
27#define PIR_PIN           13
28#define LDR_PIN           34   // ADC1_CH6
29#define FLASH_LED_PIN     4
30
31// Telegram
32String BOT_TOKEN = "";      // will be filled by WiFiManager
33String CHAT_ID   = "";      // will be filled by WiFiManager
34
35WiFiClientSecure client;
36UniversalTelegramBot bot("", client);
37
38unsigned long lastTrigger = 0;
39const long TRIGGER_INTERVAL = 10000;  // min 10 s between photos
Camera Configuration
The configCamera() function is where we tell the ESP32-CAM exactly how to handle the OV2640 camera module. First, we map all the physical pins to the camera structure - this is critical and must match your board's actual wiring.
The xclk_freq_hz is set to 20 MHz, which is the standard clock frequency for the OV2640. The pixel format is JPEG because we're sending photos over Telegram - raw formats would be too large and slow.
Here's the smart part: if PSRAM is detected (4 MB of external memory), we can use UXGA resolution (1600x1200) with better quality (lower JPEG quality number = better image). If there's no PSRAM, we drop to SVGA (800x600) to avoid memory crashes. The fb_count (framebuffer count) is set to 2 with PSRAM for smoother capture, or 1 without it.
If initialization fails, the board restarts automatically - this handles the common "camera probe failed" error that happens if you don't connect the camera ribbon cable properly.
1//  Camera Init
2void configCamera() {
3  camera_config_t config;
4  config.ledc_channel = LEDC_CHANNEL_0;
5  config.ledc_timer   = LEDC_TIMER_0;
6  config.pin_d0 = Y2_GPIO_NUM;
7  config.pin_d1 = Y3_GPIO_NUM;
8  config.pin_d2 = Y4_GPIO_NUM;
9  config.pin_d3 = Y5_GPIO_NUM;
10  config.pin_d4 = Y6_GPIO_NUM;
11  config.pin_d5 = Y7_GPIO_NUM;
12  config.pin_d6 = Y8_GPIO_NUM;
13  config.pin_d7 = Y9_GPIO_NUM;
14  config.pin_xclk = XCLK_GPIO_NUM;
15  config.pin_pclk = PCLK_GPIO_NUM;
16  config.pin_vsync = VSYNC_GPIO_NUM;
17  config.pin_href = HREF_GPIO_NUM;
18  config.pin_sscb_sda = SIOD_GPIO_NUM;
19  config.pin_sscb_scl = SIOC_GPIO_NUM;
20  config.pin_pwdn = PWDN_GPIO_NUM;
21  config.pin_reset = RESET_GPIO_NUM;
22  config.xclk_freq_hz = 20000000;
23  config.pixel_format = PIXFORMAT_JPEG;
24
25  if (psramFound()) {
26    config.frame_size = FRAMESIZE_UXGA;
27    config.jpeg_quality = 10;
28    config.fb_count = 2;
29  } else {
30    config.frame_size = FRAMESIZE_SVGA;
31    config.jpeg_quality = 12;
32    config.fb_count = 1;
33  }
34
35  esp_err_t err = esp_camera_init(&config);
36  if (err != ESP_OK) {
37    Serial.printf("Camera init failed: 0x%x\n", err);
38    delay(1000);
39    ESP.restart();
40  }
41}
Function To Send Photos
This is the heart of the doorbell. When motion is detected (or you send /photo), this function springs into action.
First, we turn on the flash LED for 100ms to illuminate the scene - crucial for night shots. Then esp_camera_fb_get() captures a frame into a framebuffer (fb). If the capture fails (returns NULL), we turn off the flash and bail out.
The magic happens with bot.sendPhotoByBinary() - it takes the raw JPEG data from fb->buf, wraps it in a multipart/form-data HTTP request, and posts it directly to Telegram's servers. The parameters are: chat ID, filename, data length, binary data, MIME type, and a boolean for "is multipart".
Finally, esp_camera_fb_return(fb) releases the framebuffer memory back to the system. Skipping this causes memory leaks and crashes after a few photos. Always return your framebuffers!
1//  Take & Send Photo
2String sendPhoto() {
3  digitalWrite(FLASH_LED_PIN, HIGH);
4  delay(100);
5
6  camera_fb_t * fb = esp_camera_fb_get();
7  if (!fb) {
8    digitalWrite(FLASH_LED_PIN, LOW);
9    return "Capture failed";
10  }
11
12  digitalWrite(FLASH_LED_PIN, LOW);
13
14  String result = bot.sendPhotoByBinary(CHAT_ID, "photo.jpg", fb->len, fb->buf,
15                                        "image/jpeg", true);
16
17  esp_camera_fb_return(fb);
18  return result;
19}
Function To Handle New Messages
The handleNewMessages() function processes commands from Telegram. It loops through all new messages and first checks if the sender's chat_id matches your authorized CHAT_ID - this prevents random people from controlling your doorbell.
The /start command sends a help menu listing all available commands. The /photo command immediately triggers a photo capture and sends it back. The /flashon and /flashoff commands let you remotely control the flash LED - useful for seeing what's outside at night or scaring away unwanted visitors.
The /status command reads the LDR (light sensor) using analogRead() and reports the uptime in seconds. The LDR value ranges from 0 (dark) to 4095 (bright) on the ESP32's 12-bit ADC. You can use this to debug lighting conditions and set thresholds for future features like auto-flash activation.
Notice how we use bot.sendMessage() for text responses and sendPhoto() for images. The empty string at the end is for parse_mode - leave it blank for plain text.
1//  Telegram Commands
2void handleNewMessages(int numNewMessages) {
3  for (int i = 0; i < numNewMessages; i++) {
4    String chat_id = bot.messages[i].chat_id;
5    String text    = bot.messages[i].text;
6
7    if (chat_id != CHAT_ID) {
8      bot.sendMessage(chat_id, "Unauthorized user", "");
9      continue;
10    }
11
12    if (text == "/start") {
13      String msg = "ESP32-CAM Doorbell\n\n";
14      msg += "/photo – take photo now\n";
15      msg += "/flashon /flashoff – control flash\n";
16      msg += "/status – uptime & light level";
17      bot.sendMessage(chat_id, msg, "");
18    }
19
20    if (text == "/photo") {
21      bot.sendMessage(chat_id, "Taking photo...", "");
22      String res = sendPhoto();
23      if (!res.startsWith("OK")) bot.sendMessage(chat_id, "Failed: " + res, "");
24    }
25
26    if (text == "/flashon")  { digitalWrite(FLASH_LED_PIN, HIGH); bot.sendMessage(chat_id, "Flash ON", ""); }
27    if (text == "/flashoff") { digitalWrite(FLASH_LED_PIN, LOW);  bot.sendMessage(chat_id, "Flash OFF", ""); }
28
29    if (text == "/status") {
30      int light = analogRead(LDR_PIN);
31      String msg = "Uptime: " + String(millis()/1000) + " s\n";
32      msg += "LDR raw value: " + String(light);
33      bot.sendMessage(chat_id, msg, "");
34    }
35  }
36}
Setup Function
The setup() function runs once at boot. First, we disable brown-out detection with WRITE_PERI_REG(RTC_CNTL_BROWN_OUT_REG, 0) - this prevents random resets when the camera draws power during capture. The ESP32-CAM is notoriously sensitive to power fluctuations, so this line is essential.
Next, we initialize the camera with configCamera(). Then comes the WiFiManager magic: it creates two custom parameters (bot_token and chat_id) that appear in the captive portal web form. When you save the config, setSaveConfigCallback() fires and copies those values into BOT_TOKEN and CHAT_ID.
The autoConnect() method is brilliant - if the ESP32 can't find known WiFi credentials, it creates an access point called "ESP32-Doorbell-Setup". Connect to it with your phone, enter your WiFi details and Telegram credentials, and it saves everything to flash memory. On subsequent boots, it auto-connects to your saved WiFi.
Finally, client.setInsecure() disables SSL certificate verification. Telegram uses HTTPS, but verifying certificates on an ESP32 is painful and unnecessary for this project. We're not handling sensitive banking data, just doorbell photos.
1//  Setup
2void setup() {
3  Serial.begin(115200);
4  WRITE_PERI_REG(RTC_CNTL_BROWN_OUT_REG, 0); // disable brownout
5
6  pinMode(FLASH_LED_PIN, OUTPUT);
7  pinMode(PIR_PIN, INPUT);
8
9  configCamera();
10
11  WiFiManager wm;
12  WiFiManagerParameter bot_token("token", "Telegram Bot Token", "", 50);
13  WiFiManagerParameter chat_id("chat", "Your Chat ID", "", 20);
14
15  wm.addParameter(&bot_token);
16  wm.addParameter(&chat_id);
17  wm.setSaveConfigCallback([&]() {
18    BOT_TOKEN = bot_token.getValue();
19    CHAT_ID   = chat_id.getValue();
20    bot = UniversalTelegramBot(BOT_TOKEN, client);
21  });
22
23  if (!wm.autoConnect("ESP32-Doorbell-Setup")) {
24    Serial.println("Failed to connect – restarting...");
25    delay(3000);
26    ESP.restart();
27  }
28
29  Serial.println("WiFi connected – IP: " + WiFi.localIP().toString());
30
31  client.setInsecure(); // needed for api.telegram.org
32  bot = UniversalTelegramBot(BOT_TOKEN, client);
33}
Loop Function
The loop() is where everything comes together. It has two main jobs running continuously:
Motion Detection: Every iteration checks if digitalRead(PIR_PIN) is HIGH (motion detected) AND at least 10 seconds have passed since the last trigger. This time-gating prevents photo spam. When both conditions are true, it updates lastTrigger and calls sendPhoto().
Telegram Polling: Every 1 second (controlled by lastBotCheck), we call bot.getUpdates() to fetch new messages from Telegram. The parameter bot.last_message_received + 1 ensures we only get messages we haven't seen yet. If there are new messages, we pass them to handleNewMessages().
This polling approach is simple but effective for a doorbell. For battery-powered projects, you'd want to use Telegram webhooks or deep sleep instead, but for a mains-powered doorbell that needs instant response, polling every second is perfectly fine.
1//  Loop
2void loop() {
3  // Motion trigger
4  if (digitalRead(PIR_PIN) == HIGH && (millis() - lastTrigger > TRIGGER_INTERVAL)) {
5    lastTrigger = millis();
6    sendPhoto();
7  }
8
9  // Telegram polling
10  static unsigned long lastBotCheck = 0;
11  if (millis() - lastBotCheck > 1000) {
12    int numNewMessages = bot.getUpdates(bot.last_message_received + 1);
13    if (numNewMessages) handleNewMessages(numNewMessages);
14    lastBotCheck = millis();
15  }
16}
First Boot & Configuration
- Upload the sketch
- Power the ESP32-CAM → it creates a WiFi “ESP32-Doorbell-Setup”
- Connect with your phone → captive portal opens
- Enter your home WiFi + Bot Token + Chat ID → Save
- Board restarts and connects to your WiFi
Walk in front of the PIR → you get a photo in Telegram in 2–4 seconds!
With this we wrap up our first part of the Esp32 Cam Doorbell series. I hope you enjoyed reading the article.
What's Next?
Part 2 – Auto light + door-open bell + SD-card backup
Part 3 – Battery backup, watchdog, OTA, Home Assistant integration
Enjoy the new clean version – and let me know in the comments if you built it! ← Happy hacking →
If the article helped you in some way, consider giving it a like. This will mean a lot to me. You can download the code related to the post using the download button below.
If you see any bug, have a question for me, or would like to provide feedback, please drop a comment below.