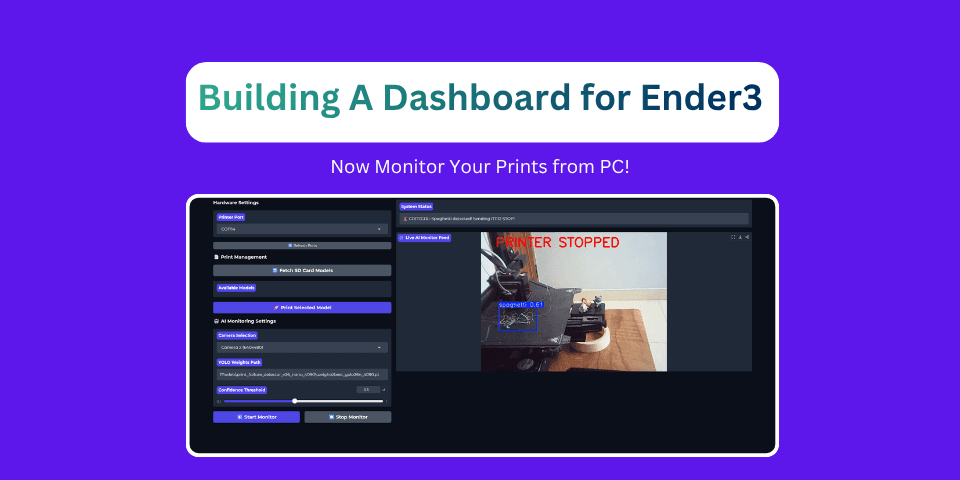
Building a Unified 3D Printer Control and AI Monitoring Dashboard with Gradio and Printcore
Ditch the SD card shuffle. Build a unified Gradio web dashboard that connects to your Ender 3 V2 Neo via USB, fetches G-code files from the printer's SD card, and runs real-time YOLOv26 print failure detection.
Ditching the SD Card Shuffle
If you own a budget-friendly 3D printer like the Creality Ender-3 V2 Neo, you know it is an incredible machine for the price. However, you also know the pain of the "SD Card Shuffle."
Every time you slice a model, you have to eject the SD card from your computer, walk it over to the printer, slot it in, navigate the printer’s dial menu, and start the print.
While solutions like OctoPrint or Klipper exist, they require a dedicated Raspberry Pi or secondary computer, which can be expensive and complex to set up.
In this post, we are building a lightweight, unified desktop dashboard using Gradio and Printrun's printcore library. Running locally on your PC, this dashboard lets you connect to your printer via USB, fetch and select G-code files directly from the printer's SD card, stream your webcam feed with real-time AI failure detection, and automatically stop the printer if a critical failure is spotted.
The Serial Port Conflict Problem
In Part 5, we created a standalone Python script to monitor our camera stream and stop the printer if spaghetti was detected. However, we hit a major roadblock: serial port locking.
USB communication with 3D printers goes over a virtual COM port. Only one program can control that port at a time. If you use a host software like Pronterface to print, your AI monitoring script cannot connect to the serial port to send an emergency stop command when a failure occurs.
By integrating printer controls and the AI monitoring loop into a single Gradio application, we solve this conflict. Both threads share a single global printcore instance, allowing the AI logic to safely send an emergency abort command over the active serial line.
Deep Dive: How the Dashboard Works
The dashboard is structured into three main layers: smart hardware discovery, SD card file management, and the concurrent AI camera generator.
1. Smart Hardware Discovery
Printers usually use USB-Serial chips (like CH340 or FTDI). We want our dashboard to find these automatically while ignoring other devices like Bluetooth COM ports.
1def get_verified_ports():
2    """Scan ports and verify which one has an active 3D printer by attempting a connection."""
3    global printer
4    ports = serial.tools.list_ports.comports()
5    usb_ports = []
6    other_ports = []
7
8    for p in ports:
9        desc = str(p.description).lower()
10        if ("usb" in desc or "ch340" in desc or "ftdi" in desc or "uart" in desc) and "bluetooth" not in desc:
11            usb_ports.append(p.device)
12        else:
13            other_ports.append(p.device)
14
15    all_ports = usb_ports + other_ports
16    best_port = all_ports[0] if all_ports else None
17
18    # Verify by making a test connection
19    if not printer or not printer.online:
20        for port in usb_ports:
21            try:
22                temp_printer = printcore(port, 115200)
23                time.sleep(4) # Wait for DTR reset
24                if temp_printer.online:
25                    printer = temp_printer
26                    best_port = port
27                    break
28                else:
29                    temp_printer.disconnect()
30            except Exception as e:
31                print(f"Connection failed on {port}: {e}")
32
33    return all_ports, best_port
[!IMPORTANT] The DTR Reset Wait: When a serial connection is opened with Marlin-based boards, the microcontroller resets. We must sleep for at least 4 to 5 seconds to let the board finish booting before sending commands.
2. SD Card Management via Serial Callbacks
Normally, running long prints over USB from a computer can be risky; if the PC sleeps or OS updates run, the print fails.
The dashboard solves this by using Marlin's SD commands. We select and run prints stored locally on the printer's SD card. The computer only issues the initial instructions, leaving the printer to run independently.
To get the list of files, we send the M20 (List SD files) G-code command and capture the output using Printrun's asynchronous receive callback (recvcb):
1def fetch_models(port):
2    """Fetch files from SD Card via M20 using an asynchronous callback."""
3    global printer, sd_files
4    success, msg = connect_to_printer(port)
5    if not success:
6        return gr.update(choices=[]), f"Error: {msg}"
7
8    sd_files = []
9
10    # Callback captures file names ending in .GCO
11    def capture_files(line):
12        line = str(line).strip()
13        if line.upper().endswith(".GCO") or " " in line and line.split()[0].upper().endswith(".GCO"):
14            filename = line.split()[0]
15            if filename not in sd_files:
16                sd_files.append(filename)
17
18    old_cb = printer.recvcb
19    printer.recvcb = capture_files
20
21    try:
22        printer.send_now("M21") # Init SD Card
23        time.sleep(1)
24        printer.send_now("M20") # List files
25        time.sleep(3)
26    finally:
27        printer.recvcb = old_cb # Restore callback
28
29    return gr.update(choices=sd_files, value=sd_files[0] if sd_files else None), f"Found {len(sd_files)} files."
Once a file is chosen, starting the print is simple:
M23 [filename]selects the file.M24starts the SD print.
3. The Unified AI Monitoring Loop
Gradio uses generator functions (using the yield keyword) to handle live streaming. Our generator opens the camera, grabs a frame, runs inference using our custom YOLOv26 model (trained in Part 4), overlays the annotations, and yields the visual frame back to the browser.
Crucially, because the generator has access to the global printer instance, it can immediately send G-code commands if spaghetti is detected:
1def run_monitor(port, cam_index, model_path, conf_thresh):
2 global is_monitoring, printer
3 is_monitoring = True
4 model = YOLO(model_path)
5 cap = cv2.VideoCapture(int(cam_index))
6
7 try:
8 while is_monitoring and cap.isOpened():
9 ret, frame = cap.read()
10 if not ret:
11 break
12
13 results = model(frame, verbose=False, conf=conf_thresh)
14 annotated = results[0].plot()
15 annotated_rgb = cv2.cvtColor(annotated, cv2.COLOR_BGR2RGB)
16
17 for result in results:
18 for box in result.boxes:
19 class_name = model.names[int(box.cls[0])].lower()
20
21 if class_name == "spaghetti":
22 # EMERGENCY ABORT
23 if printer and printer.online:
24 printer.send_now("M112") # Emergency stop
25 printer.send_now("M104 S0") # Heat off
26 printer.send_now("M140 S0") # Bed off
27 is_monitoring = False
28 break
29
30 if not is_monitoring:
31 cv2.putText(annotated_rgb, "PRINTER STOPPED", (50, 50),
32 cv2.FONT_HERSHEY_SIMPLEX, 1.5, (255, 0, 0), 4)
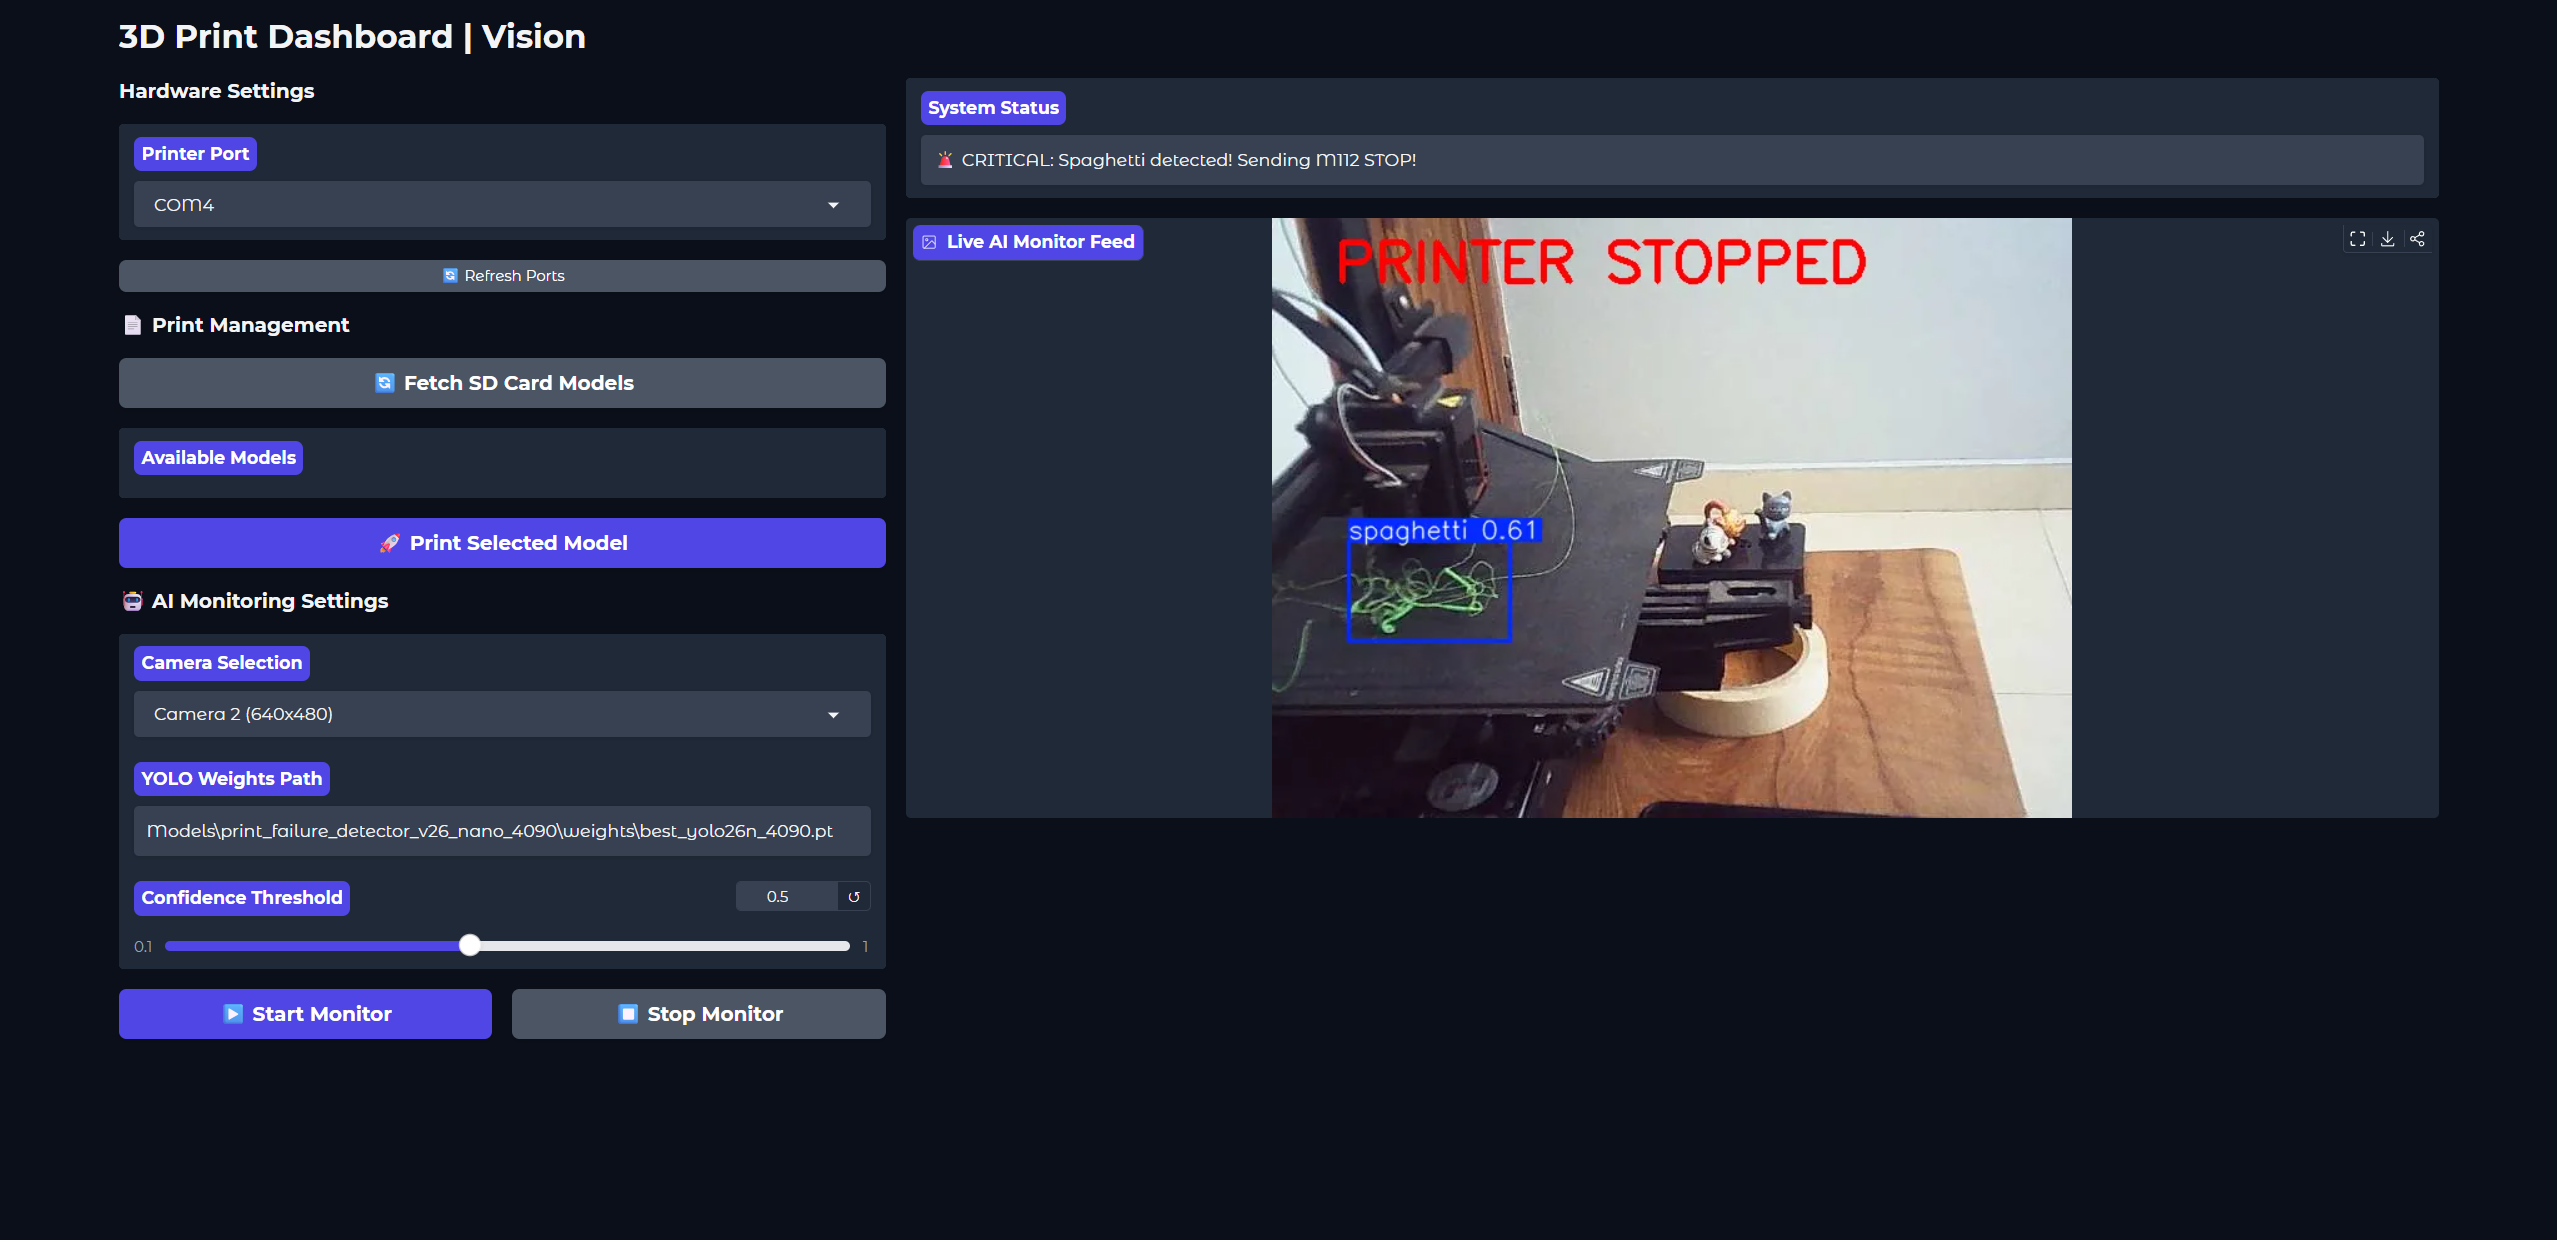
33 yield annotated_rgb, "🚨 CRITICAL: Spaghetti detected! M112 Sent."
34 break
35
36 yield annotated_rgb, "Monitoring active... Printer looking good."
37 time.sleep(1) # Throttle to 1 FPS
38 finally:
39 cap.release()[!CAUTION] Why M112? Marlin's
M112triggers an immediate emergency shutdown. It cuts power to all motors and heaters, preventing a fire hazard if the plastic spaghetti clumps around the hotend. It is non-resumable and requires a physical printer reset.
Designing the Dashboard Layout
We use Gradio's gr.Blocks() layout to structure a neat, two-column interface: the left side handles settings and print parameters, while the right displays the live webcam feed and printer status.
1with gr.Blocks(title="3D Print Dashboard") as dashboard:
2    gr.Markdown("# 3D Print Dashboard | Vision")
3
4    with gr.Row():
5        with gr.Column(scale=1):
6            gr.Markdown("### Hardware Settings")
7            port_dropdown = gr.Dropdown(label="Printer Port", choices=ports, value=best_port)
8            refresh_ports_btn = gr.Button("🔄 Refresh Ports", size="sm")
9
10            gr.Markdown("### 📄 Print Management")
11            fetch_btn = gr.Button("🔄 Fetch SD Card Models")
12            model_radio = gr.Radio(label="Available Models", choices=[])
13            print_btn = gr.Button("🚀 Print Selected Model", variant="primary")
14
15            gr.Markdown("### 🤖 AI Monitoring Settings")
16            cam_dropdown = gr.Dropdown(label="Camera Selection", choices=cams, value=best_cam)
17            model_path_input = gr.Textbox(label="YOLO Weights Path", value="Models/best.pt")
18            conf_slider = gr.Slider(label="Confidence Threshold", minimum=0.1, maximum=1.0, value=0.5)
19
20            with gr.Row():
21                start_btn = gr.Button("▶️ Start Monitor", variant="primary")
22                stop_btn = gr.Button("⏹️ Stop Monitor")
23
24        with gr.Column(scale=2):
25            status_box = gr.Textbox(label="System Status", interactive=False, value="Ready.")
26            video_feed = gr.Image(label="Live AI Monitor Feed", streaming=True)
Running the Dashboard
To set up and run the dashboard locally on your machine, activate your virtual environment and install the required dependencies:
1# Clone the repository and navigate to the directory
2git clone https://github.com/kXborg/3dPrint.git
3cd 3dPrint
4
5# Install dependencies
6pip install -r requirements.txt
7
8# Run the Gradio application
9python src/print-dashboard.py
Once running, open your web browser and go to http://127.0.0.1:7860. Turn on your printer, plug in the USB cable, and point your webcam at the print bed. You can now manage files and monitor your prints with peace of mind.
Series Navigation
- Getting Started with the Creality Ender 3 V2 Neo
- Calibrations That Actually Matter
- Slicer Deep Dive & Long Print Survival
- AI Print Failure Detection — Training YOLOv26
- Real-Time Print Monitoring & Automated Control
- Building a Remote 3D Printer Dashboard with Gradio & Printcore (You are here)
Resources
Previous Post
Breaking the Rules: A Technical Guide to LLM Jailbreaking and Abliteration
Next Post
The OpenBMB Ecosystem: A Master Guide to MiniCPM and Beyond
If the article helped you in some way, consider giving it a like. This will mean a lot to me. You can download the code related to the post using the download button below.
If you see any bug, have a question for me, or would like to provide feedback, please drop a comment below.